How to Replace a Control Arm (Upper or Lower)
Quick Summary
A worn control arm shows up as clunking over bumps, loose steering, and uneven tyre wear. Replacing one means lifting the car safely, removing the wheel, releasing the ball joint, and fitting the new arm to the correct torque. A wheel alignment follows every replacement. This suits drivers and home mechanics judging a control arm replacement.
A damaged control arm can affect how your car handles, turns, and stays stable on the road. It can also cause uneven tyre wear and unusual noises when driving over bumps. Replacing a worn part at the right time helps keep the suspension system safe and working properly.
To replace a control arm, first park the car on a flat surface and secure it with wheel chocks. Next, loosen the wheel nuts, lift the car, and remove the wheel to reach the suspension parts.
Disconnect the ball joint, stabilizer link, and control arm mounting bolts as required. Fit the new upper or lower arm, tighten all fasteners to the correct torque, and check the wheel alignment before driving.
The process may look simple, but control arm replacement needs the right tools and care. The upper and lower arms have different positions and mounting points, so their removal methods can vary between car models.
What Is a Control Arm and What Does It Do?
A control arm is a key part of a car's suspension system. It connects the steering knuckle to the vehicle's frame or subframe. Most cars have upper and lower control arms, although some suspension designs use only one arm or a different layout.
These parts allow the wheels to move up and down while helping keep them in the correct position. They work with ball joints, bushings, springs, and shock absorbers to provide a stable and smooth ride.
Upper Control Arm
The upper control arm sits above the steering knuckle and connects the wheel assembly to the vehicle's frame. It helps control the angle of the wheel during suspension movement.
In many double-wishbone suspension systems, it works with the lower arm to maintain proper wheel alignment. A worn upper arm can cause loose steering, uneven tyre wear, and knocking sounds when driving over rough roads.
Lower Control Arm
The lower control arm sits below the steering knuckle and often carries more of the suspension load. It helps control wheel movement during braking, acceleration, and cornering. It usually connects to the chassis through rubber bushings and to the steering knuckle through a ball joint.
Damage to this part can affect vehicle stability and make steering less predictable, especially when driving over bumps or turning.
Signs That Your Control Arm Needs Replacement
Control arms can wear out over time because they are exposed to road impacts, vibration, heat, and regular movement. Rubber bushings may crack, ball joints can become loose, and the metal arm itself may bend or rust.
Recognising the warning signs early can help prevent further damage to the suspension system. If you notice changes in steering or unusual sounds, have the suspension inspected before replacing any parts.
Common signs include:
- Clunking noises: A loose ball joint or worn bushing can create knocking sounds when driving over bumps.
- Uneven tyre wear: A damaged arm can change wheel alignment and cause one side of the tyre to wear faster.
- Loose steering: Excessive movement in suspension joints may make the steering feel less stable.
- Vehicle pulling to one side: A bent arm or incorrect wheel angle can cause the car to drift.
- Vibration while driving: Worn suspension parts may cause shaking through the steering wheel or floor.
- Visible damage: Cracks, bends, rust, or torn rubber bushings can indicate a problem.
These symptoms can also come from other suspension or steering parts. A proper inspection helps identify the actual cause.
Tools and Parts Needed for Control Arm Replacement
Having the correct tools before starting the job makes the replacement process safer and easier. The exact tools depend on the car's suspension design and whether you are changing the upper or lower arm.
Some models have pressed-in bushings, while others come with complete control arm assemblies. Always check the vehicle repair manual for the correct tool sizes, torque settings, and removal steps before beginning work.
You may need the following tools and parts:
| Tool or Part | Purpose |
|---|---|
| Hydraulic floor jack | Lifts the vehicle off the ground |
| Jack stands | Support the vehicle safely |
| Wheel chocks | Stop the wheels from moving |
| Socket and spanner set | Remove nuts and bolts |
| Breaker bar | Loosen tight fasteners |
| Torque wrench | Tighten bolts to factory settings |
| Ball joint separator | Disconnect the ball joint |
| Penetrating oil | Helps loosen rusty bolts |
| Pry bar | Helps move suspension parts when needed |
| New control arm | Replaces the damaged component |
| Replacement nuts and bolts | Used where the manufacturer requires new fasteners |
You should also wear safety glasses and work gloves. Never rely on a hydraulic jack alone to hold a vehicle while working underneath it.
How to Replace a Control Arm Step by Step
Replacing an upper or lower control arm involves disconnecting the old part, fitting the new assembly, and checking the suspension after installation. The steps below cover a common control arm setup, but the exact process can differ between vehicles.
Some cars require the removal of extra suspension parts, while others have limited working space. Always follow the repair instructions for your specific make and model.
Step 1: Park and Secure the Vehicle
Park the car on a flat, solid surface and switch off the engine. Apply the parking brake and place wheel chocks behind the wheels that will remain on the ground.
Loosen the wheel nuts slightly before lifting the vehicle because they are easier to remove while the tyre is still touching the ground. Check that the working area is clear and that you have enough space to access the suspension safely.
Step 2: Lift the Car and Remove the Wheel
Place the floor jack under the correct lifting point listed in the vehicle manual. Raise the car until the tyre is off the ground, then position a jack stand under an approved support point. Lower the vehicle onto the stand and check that it is stable before continuing.
Remove the wheel nuts and take off the tyre. You should now have a clear view of the control arm, ball joint, and suspension mounting points.
Step 3: Locate the Control Arm and Inspect Its Connections
Identify whether you are replacing the upper or lower control arm. Look at how the arm connects to the chassis, steering knuckle, and other suspension parts. Check the bushings for cracks, tears, or separation from their metal sleeves.
Inspect the ball joint for damaged rubber boots or signs of looseness. Take a picture of the original setup before removing anything. This can help you remember the position of bolts, washers, and other parts during installation.
Step 4: Disconnect the Ball Joint
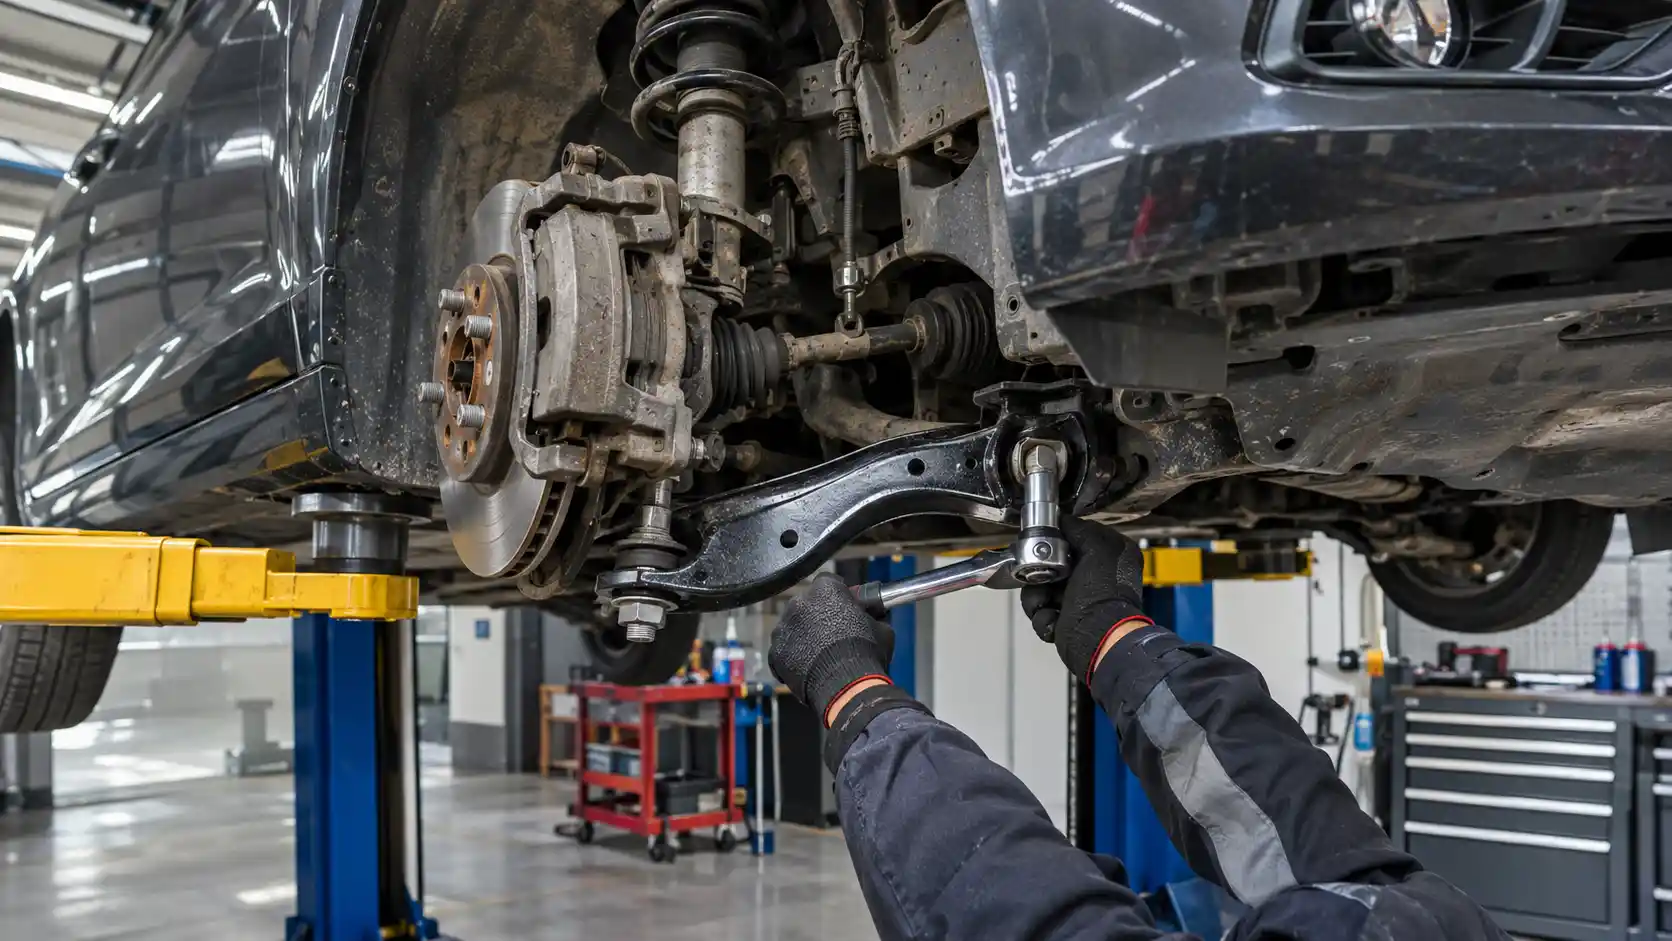
The ball joint connects the control arm to the steering knuckle and allows the wheel to move while turning. Remove the ball joint nut according to the vehicle's repair instructions. Some designs use a pinch bolt, while others have a tapered stud held by a nut.
Use a suitable ball joint separator to release the joint. Avoid hitting the threaded stud directly because this can damage it. Support the steering knuckle so it does not hang by the brake hose or other connections.
Step 5: Remove the Control Arm Mounting Bolts
The control arm is usually attached to the chassis through one or more mounting bolts. Apply penetrating oil if the fasteners are rusty or difficult to turn. Remove the bolts carefully while supporting the arm to prevent it from dropping suddenly.
Some lower arms may also connect to a stabilizer link or other suspension parts that need to be disconnected first. Keep the bolts and washers organised, and note their original positions for correct installation.
Step 6: Remove the Old Control Arm
Once the ball joint and mounting bolts are disconnected, carefully pull the old arm away from its mounting points. Some control arms may need a small amount of movement to clear nearby suspension parts.
Do not force the arm against brake lines, wiring, or other components. Compare the old part with the replacement before fitting it. Check that the length, mounting holes, bushing positions, and ball joint design match the original component.
Step 7: Install the New Control Arm
Position the replacement arm in the same location as the old one. Start the mounting bolts by hand to make sure the threads are correctly aligned. Reconnect the ball joint to the steering knuckle and fit the required nuts or locking parts.
If the manufacturer recommends replacing certain fasteners, use new ones rather than reusing the old hardware. Do not fully tighten rubber-bushed mounting bolts while the suspension is hanging unless the repair manual specifically allows it.
Step 8: Tighten All Bolts to the Correct Torque
Use a torque wrench to tighten the mounting bolts and ball joint fasteners to the manufacturer's specifications. The correct torque is important because loose bolts can allow unwanted movement, while excessive tightening may damage threads or bushings.
Many control arm bushings need to be tightened at normal ride height. This helps prevent the rubber from staying twisted when the car is back on the road. Follow the vehicle's service manual for the correct tightening sequence.
Step 9: Refit the Wheel and Lower the Vehicle
Check that all connected parts are properly installed and that no tools are left inside the suspension area. Refit the wheel and tighten the wheel nuts by hand first. Remove the jack stand and lower the vehicle carefully using the floor jack.
Once the tyre touches the ground, tighten the wheel nuts in a star pattern using a torque wrench. Follow the wheel nut torque value provided by the vehicle manufacturer.
Step 10: Check the Suspension and Get Wheel Alignment
After installation, inspect the control arm and nearby parts for loose connections or incorrect positioning. Turn the steering wheel from side to side and check for unusual movement or contact between components.
A professional wheel alignment is strongly recommended because replacing a control arm can change the suspension geometry. The technician should check camber, caster, and toe angles. Take a short, careful test drive only after confirming that all fasteners are secure.
How to Replace an Upper Control Arm?
The upper control arm is usually located above the wheel hub and may be easier to reach than the lower arm on some vehicles. However, its mounting points can be difficult to access in certain suspension designs.
Start by removing the wheel and locating the upper arm's frame connections. Disconnect the ball joint from the steering knuckle, then remove the mounting bolts. Fit the new arm in the same position and tighten everything according to the manufacturer's torque settings.
Important Points During Upper Arm Replacement
Some upper control arms have adjustable mounting bolts that affect camber and caster angles. Marking their original positions can help during installation, but it does not replace a proper wheel alignment.
On some vehicles, the upper arm may be mounted inside the engine bay or close to other components. Follow the correct removal procedure to avoid damaging nearby parts. If the arm has separate bushings or ball joints, check whether replacing the complete assembly is more suitable.
How to Replace a Lower Control Arm
The lower control arm often supports a large part of the suspension load, so it may require more effort to remove. Start by lifting the vehicle and removing the wheel. Locate the lower ball joint and chassis mounting bolts.
Disconnect any stabilizer links or other parts that prevent the arm from coming out. Support the suspension while removing the old arm, then position the replacement and reconnect all mounting points. Tighten the fasteners using the correct factory torque values.
Important Points During Lower Arm Replacement
Some lower control arms connect to the steering knuckle through a press-fit ball joint, while others use bolts or a pinch connection. The removal method depends on the design. You may need a special puller or ball joint separator for the job.
Never let the steering knuckle hang from the brake hose or ABS wiring. Also, check the lower arm bushings and ball joint before installation because these parts play an important role in handling and braking stability.
Should You Replace the Control Arm or Only the Bushings?
A control arm does not always need complete replacement when its rubber bushings wear out. On some vehicles, the bushings can be removed and replaced separately using a hydraulic press and the correct fitting tools.
This can reduce parts costs if the metal arm and ball joint are still in good condition. However, a bent, cracked, or badly rusted arm should be replaced as a complete unit to restore proper suspension strength.
Replacing the complete assembly may be a better choice when the ball joint is also worn or when the new arm comes with bushings already fitted.
It saves the time needed to remove and press in separate parts. Always compare the cost of individual components with a complete assembly before making a decision. The condition of the original arm and the manufacturer's repair guidance should determine the best option.
Common Mistakes to Avoid During Installation
Control arm replacement requires more than removing the old part and fitting a new one. Small installation mistakes can affect wheel alignment, steering, and suspension life. Using the wrong bolts, tightening bushings at the wrong position, or skipping the final inspection can lead to further problems. Following the correct repair steps helps avoid these issues and keeps the suspension working as designed.
Avoid these common mistakes:
- Working without jack stands: A hydraulic jack can fail, so always use approved support stands.
- Using incorrect torque settings: Over-tightening or loose fasteners can damage suspension parts.
- Reusing damaged hardware: Replace worn or damaged nuts and bolts where required.
- Ignoring wheel alignment: Incorrect suspension angles can cause uneven tyre wear.
- Damaging the ball joint boot: A torn boot allows dirt and water to enter, which can shorten joint life.
- Tightening bushings while suspended: This can place extra stress on rubber bushings after the car returns to normal ride height.
- Skipping the final inspection: Check all connections before lowering the car and driving.
Taking extra care during installation can help prevent repeat repairs and protect other suspension components.
How Much Does Control Arm Replacement Cost?
The cost of replacing a control arm depends on the car model, part quality, labour charges, and suspension design. Luxury cars and models with complex suspension systems may cost more because their parts are more expensive and harder to access.
Replacing a complete assembly can also cost more than changing individual bushings. In addition, wheel alignment may be charged separately after installation. It is best to get a full estimate before approving the repair.
The total repair cost usually includes:
- Control arm price: Depends on the vehicle brand, model, and part quality.
- Labour charges: Vary according to how difficult the old arm is to remove.
- Additional parts: Ball joints, nuts, bolts, and bushings may need replacement.
- Wheel alignment: Helps restore the correct wheel angles after the repair.
Ask the workshop whether the quoted price includes inspection, installation, and wheel alignment. A clear estimate helps you understand what you are paying for and avoid unexpected charges.
How Long Does It Take to Replace a Control Arm?
The time needed to replace a control arm depends on the vehicle and the condition of its suspension parts. A straightforward replacement may take around one to two hours per arm at an equipped workshop.
However, rusty bolts, seized ball joints, and difficult mounting points can increase the repair time. Some vehicles require extra suspension parts to be removed before the arm can be accessed. A final wheel alignment may add more time to the overall job.
Replacing both upper and lower arms on the same side can take longer than changing one part. The repair may also take additional time if the mechanic finds worn bushings, damaged ball joints, or other suspension problems during inspection.
A proper repair should not be rushed because every connection needs to be checked before the vehicle returns to the road.
Can You Drive With a Damaged Control Arm?
Driving with a damaged control arm is not recommended because it can affect steering control and vehicle stability. A worn bushing may cause small handling changes at first, but a severely damaged ball joint or bent arm can create a serious safety risk.
In extreme cases, a failed ball joint may separate from the steering knuckle, causing the wheel to move out of its correct position. This can result in a loss of control.
If you hear loud knocking sounds, notice severe steering changes, or see a visibly bent control arm, stop driving and arrange a professional inspection. Do not wait for the part to fail. Early repairs can help prevent damage to tyres, steering parts, and other suspension components.
How to Make Your Control Arms Last Longer
Control arms are designed to handle regular road movement, but their life depends on driving habits, road conditions, and maintenance. Potholes, rough roads, overloaded cars, and repeated hard impacts can put extra stress on the suspension.
Regular inspections help find worn bushings, loose ball joints, and rust before they become bigger problems. You should pay attention to unusual sounds and changes in steering rather than waiting until the suspension becomes difficult to control.
Here are some ways to protect your suspension:
- Drive slowly over speed bumps and potholes.
- Avoid carrying more weight than your car's rated limit.
- Get the suspension checked during regular servicing.
- Replace damaged ball joint boots and worn bushings promptly.
- Keep tyres inflated to the recommended pressure.
- Get wheel alignment checked when you notice uneven tyre wear.
- Use good-quality replacement parts that match your vehicle.
These simple habits can reduce unnecessary stress on the suspension and help other connected parts last longer.
Frequently Asked Questions
How do I know if the upper or lower control arm is worn?
Both arms give similar warnings, so an inspection is the only reliable way to tell. A worn upper arm often brings loose steering and knocking over rough roads. A damaged lower arm affects stability under braking and cornering because it carries more of the suspension load.
Do I need a wheel alignment after replacing a control arm?
Yes. Replacing a control arm changes the suspension geometry, so camber, caster, and toe angles need checking. Skipping the alignment can cause uneven tyre wear and a car that pulls to one side. We recommend booking the alignment as part of the same visit.
Can I replace only the bushings instead of the whole control arm?
Sometimes. On cars with pressed-in bushings, they can be changed separately using a hydraulic press, which saves parts cost when the arm and ball joint are still sound. A bent, cracked, or badly rusted arm should be replaced as a complete unit.
How long does control arm replacement take?
A straightforward replacement takes around one to two hours per arm at an equipped workshop. Rusty bolts, seized ball joints, and tight mounting points add time, and some cars need other suspension parts removed first. A final wheel alignment adds more time.
Why should control arm bolts be tightened at ride height?
Rubber bushings set in whatever position they are tightened in. Torquing the mounting bolts while the suspension hangs leaves the rubber twisted once the car is back on its wheels, which shortens bushing life. Many manufacturers specify tightening at normal ride height for this reason.
Conclusion
Replacing an upper or lower control arm involves lifting the car safely, removing the wheel, disconnecting the ball joint, and taking out the old mounting bolts. The new arm must match the original part and be installed in the correct position.
All fasteners should be tightened to the manufacturer's torque settings, and the suspension should be checked before driving. A professional wheel alignment is important after the replacement to restore correct camber, caster, and toe angles.
The upper and lower arms have different positions and may require different removal tools. Always inspect the bushings, ball joints, and nearby suspension parts during the repair. If you notice knocking sounds, loose steering, or uneven tyre wear, arrange an inspection before the damage becomes worse.
Need Professional Control Arm Replacement in the UAE?
If your car has suspension noise, steering problems, or uneven tyre wear, get it checked by an experienced mechanic. 800Sayara offers car repair and suspension services to help keep your car safe and comfortable on the road. Its workshops have trained mechanics who can inspect worn control arms, identify related suspension problems, and recommend the right repairs.
Need a trusted garage in the UAE?
Book expert car service with 800Sayara in Dubai, Abu Dhabi and Sharjah.
Book Appointment